Thursday 4 June 2009

Ken - Marbling


Hello,

I saw some of your online videos and was deeply impressed.
I am working on a reception counter, and I was wondering
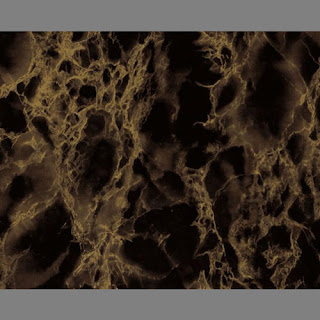
how I would go about doing a gold marble with kind of a 3D
effect as shown in the attachment.  I really really need your
help.

Thank you so much,
Ken

Ken
 
You don't give me any idea of the level of skills you have.
 
The photo you have sent is typical of marble, whether it's real or painted, it has that translucent, you can see just so far into or below the surface of the material. You call it a 3D effect.
 
Whatever marble, whatever colour you want to create to be a marble effect it must have a '3D effect'.
We're lucky, the sample has a dark background. Dark colours tend to recede where light colours will advance.
 
If your brief is to copy a particular piece of marble then first find the darkest colour in the sample and paint the background with it.
Find the lightest and that is your final veining colour.
 
Mix a small amount of the lightest colour with the darkest and create a cloud effect, some cloud shapes with hard edges some without. Parts of the clouds must look like they are disappearing into the background. Create a heavy vein on top of the clouding with a colour lighter than the clouding. Create a second vein lighter and sharper than the last and finally, with the lightest colour and only on the last vein a sharp small vein.
 
If it is going on a reception counter then the finish will need protecting.
 
Hope this helps
Fred

Thank you for your help!

As you probably have noticed, I am a beginner.  I just started practicing faux a couple of months ago.  I drew in some of the clouds but I am having a lot of trouble with the veining.  I am working with water based paint and it seems really difficult to do the veining.  Maybe I just need a lot of practice. 

Thank you,
Ken 

Ken
It is difficult with oil based but bloody difficult with water based.
Are you using acrylic tube colours? or ready mixed. It is best I think to
mix your own.
Try and experiment with tube colour and glycerine or KY jelly. Use a pure
sable or kolinsky hair number 4 or 6, depending on the size of vein. Roll
the brush between the thumb and forefinger at the same time moving over the
surface.
If this all sounds a bit confusing then give us a call back.
Fred 

Justine - Blending

Hi my name is justine i hope you dont mind me getting in touch, i happened to come across you on a web site as i was looking for painting techniques.  I need to blend dark green to a lighter green and then to  a yellow at the top and i have no idea how to do this.  My children are Ben 10 mad and want their rooms decorated, these are the colours and rather than have one wall a colour and so on i thought about blending the colours up the walls from dark green to yellow. 
I hope you dont mind but i need help and dont want to make a mess of it.
Yours a desperate mother in need of decorating tips
Justine

Justine
 
This is a technique from years past but created in then in oil paint.
The process was very messy, high in solvents, difficult to clean up after and when done a fire hazard - the good old days.
It can now be achieved in water based products, but it can be a bit more difficult.
I don't know how your skills are or if you have the tools.
Anyway here we go...........
 
TOOLS
Brushes to apply the water based paint- 2"and 4" or a flat wall brush.
Buckets or plastic paint kettles to mix the paint.
Sponges and clothes.
Hogs hair stippling brushes two 6" x 4" or as big as you can get.
Dust sheets.
Tools to prepare the walls if necessary.
 
MATERIALS
Acrylic eggshell for a base colour of your choice.
Clear acrylic scumble.
Acrylic tube colours or stainers of your choice.
Materials to prepare the walls if necessary.
 
METHOD
I would suggest you create this effect in panels on the wall, not the full wall itself, it can be a daunting task.
Apply the base colour, without any brush marks if you can or roller it to create an even roller texture.
Practice this first, be prepared to paint it over if you make a mistake, mix the scumble with the tube colour to the strength you want. Check how much tube colour to scumble then if it dries too quick you can add more scumble.
 
Apply the lower colour, say green, first to about one third the way up, apply the top colour say yellow to the top third. Mix the bottom and the top colour in equal amount and apply this to the middle third.
 
Before you start charge the stippler with some colour, so as it does not pull the colour off the wall. Work along the bottom in a straight line and then back along the same line but one half the way up the first stipple. Do this and work your way into the mixed colour in the middle third. Then with a clean stippler do the same from the top down. Do not turn the stippler round, keep it going in the same way with the same edge going in the same direction. Stipple into the centre to give a gradual change of colour, no lines or a jump from one colour to the next.
 
Do not start with too strong a colour use colour that have been slightly neutralised and don't put the colour on too heavy.
 
Hope this helps
Fred

Jason - Marbled Slate Fire Surround

Hi Fred, please help.

We have a huge slate marble effect fire surround and it really 
doesn't look good. It over powers quite a small room. I love original 
features but feel I have to do something to make the surround more 
attractive.

Can I get rid of the marble effect with chemicals or should I use a 
specialist paint as I would like it to be a simple feature of the 
slate. I can paint it white as a last resort but feel this is a step 
to far although I like the look. Please help.

Many thanks
Jason

Jason
 
First take pictures of what is left of the marble effect on the slate.
The effect has been produced with oil paint and if it has started to flake or peel off then the only action is to remove all of it and start afresh.
I am presuming the effect has been created in panels and can be reproduced in the style.
To remove the existing work, and so as not to damage the easily damaged slate, do not use scrapers or solvents.
Rub the surface down with wet or dry abrasive paper.
This is the same paper that car body repairers use when spraying car bodywork.
Use a 240 grade to start and finish with a 320 or even a 400 grade and use plenty of water so as not to scratch the surface.
Once this is done and the surface clean and smooth redecoration can commence.
Apply several thin coats of oil based eggshell black and when dry marble the panels as they were before, or if you are not up to it, get in touch with a local decorator to do it for you.
Or, you can paint the surround in what ever colour you wish, perhaps picking out the panels in different colours of your choice.
Hope this helps in some way,
 
Yours
Fred.

Mervyn - Nicotine Stains

Dear Fred,
 
I got your e-mail from the decorating website.
 
I am trying to paint a ceiling that is covered with tongue and groove pine boarding, apparently varnished with a sort of chestnut brown colour.   I have applied two coats of Dulux white emulsion but there is brown staining bleeding through the coats.   Do I have to seal it or is there another solution?   If I have to seal, what do you recommend?
 
Best Regards,

Mervyn

You can get water staining on a ceiling if there has been a leak from above but this sounds like Nick O'teen.
Before painting it is best to wash with sugar soap to remove nicotine stains.
But you can paint the stained area with normal oil based undercoat and when dry give it another coat of emulsion.
Hope this has helped in some way.
 
Fred

Robert - Preparation Problems

I am redecorating flat which is normally  let before readvertising for new let .I am having problems with the bathroom which tenant had changed colour from white  to a sort of magnolia colour .I intended to change colour  back to brilliant white .I had put two coats of emulsion on walls and ceilings.each coat was allowed several days to dry before applying next one .However the previous  colour was still showing through today which is 3 days after I did the second coat. I attempted to do the third coat  and to my horror found  that when I was rollering or brushing the paint on it was actually dragging the 2 previous white coats in lumps and exposing the previous colour .Can you please advise me as to what is needed to stop this problem recurring.
Thanks
Rob Rees

Robert
 
Sounds a did like the surface hasn't been prepared correctly.
 
If it's taking longer than two hours to dry then it could be condensation on the walls. The cure for that is open windows and doors to allow for circulation of air. When all the walls are dry prepare by sanding with medium glasspaper and dust off. Apply emulsion (that is if you are using emulsion) in the normal way.
 
If the roller is pulling the previous coats off the surface then it could be the walls have previously been painted with gloss paint. Gloss painted surfaces must be roughed up (the shine taken off) before applying emulsion paint. You can do this by sanding with coarse glasspaper and washing with sugar soap.
 
If it's oil paint, gloss or eggshell, you are using then it could be grease or soap deposits on the surface, if so then the surface must be washed with sugar soap to remove all contamination before painting.
 
It could be that preparation wasn't done last time it was decorated and with you now applying a new coat system the roller is pulling the old paint completely from the wall, if this was the case then you would see it coming off in medium to large strips. Preparation can be messy here but washing with sugar soap should get most of the previous paint off the wall.
 
Good luck!
 
Hope this has been of some help for you.
 
Fred

Marianne - Pattern Staining

I wonder if you can help?

After lining the living room walls, my husband then painted them a pale yellow colour.  The result was brilliant, but now, some years later, there are dark lines showing through in a pattern which resembles the edges of the breeze blocks underneath the plaster.  Is this a common problem?  What should we do to prevent it happening again now we want to re-decorate?

Marianne 

Marianne
 
You almost had the reason for this problem when you mentioned the word pattern.
It is in fact known as 'pattern staining' and occurs because there is a difference of temperature between the breeze block and the mortar joints.
 
The blocks contain many air holes and are warmer than the more dense cement joints.
Warm air in your room, which carries fine particles of dust, is attracted to the colder parts of the wall, in this case the mortar, and over a period of time a pattern of the joints will appear.
 
The solution. The first and most expensive is to inject the cavity with insulation, this work must be carried out by a qualified installer. Or you could line the wall with expanded polystyrene before normal decoration, but do not forget, expanded polystyrene is highly flammable. Decorating the problem area more often may be your solution, or using a different colour.
 
Hope this goes some way to solving your problem.
 
Fred Biddulph

Kevin - Emusion Problems

Hi.Hope you can help.
Iam in the process of paintig newly plastered flats and a massive stairwell.All the walls were first coated with whits emulsion, then a coat of magnolia.Now i am finishing off with another coat of mag.The problem is that when you look along or up the walls there are black shadows resulting in what looks like a mess.Iam rolling out in metre sections and have tried both short and medium pile rollers (Hamilton).Some of the walls are 12 feet high so its difficult to roll quickly.I just don't seem to get a good flat finish.
Any ideas and advice
Kevin

Kevin
 
This is a new one on me, black shadows, unless the new plastering is uneven which these days, and I am not criticising your plasterers, is not uncommon.
You never said if you thinned the first coat of emulsion if not it could cause uneven absorption.
Interior lighting can play tricks on the eye, try and view your work in daylight only.
 
Hope this is of some help
Yours
Fred Biddulph

Steve - Ground Coats for Graining

Hi Fred,  Im reading a book on graining tecniques,
 and Buff is used a lot in varying tones as a  ground colour
mainly Wulnut on a B.S 0800 chart what would come close
Thanks.

Hello Stephen
 
I do not know which reference you are using but if you are looking at a British Standards 4600 chart then the buff colour would be BS 08C35, it is used a lot as a base for Oak.
Some advise try looking at polished woods and pick out the palest colour and when imitating use that pale colour as the ground coat.
 
Fred.

Tara - Scumble

Tara's Question

Question

I found your web site, not sure if I can write and ask just willy nilly, but was wondering if you had a good recipe for oil based and acrylic scumble glaze.

I live in Kenya and you cannot buy these off the shelf here.

Thank you

Tara


Answer

You can certainly ask willy nilly, I haven't heard that expression for a long time.

I might even give you a willy nilly answer.

For the oil scumble you willy need one part raw linseed oil of any type or perhaps boiled oil, two parts turpentine or turps substitute and a small amount, 10% to 20% of the whole mixture, of terebine dryers or if you are using boiled oil then just a very small amount.

I use just that mixture when creating marble effects but some people add melted bees wax to make a scumble.

For the acrylic scumble you willy need the paint and propylene glycol, that is what is in the manufactured water based scumble found in the shops. But you can make your own - the paint and glycerine, synthetic or natural, or a material you can buy in a chemist called KY jelly, that's the same as synthetic glycerine.

Noel - Turpentine

Noel's Question

Why are turpentine or thinner added to paint?

ANSWER

Oil paint, which turpentine or thinner would be added to, is made up, basically, of:-

  1. Pigment - to give colour, bulk and opacity. Normally in powder form so you can imagine the difficulty in applying to a wall on its own. Note:- there are other powder ingredience's, but we won't go into them here.

  2. Oil - to bind the particles of powdered pigment together. Just oil and pigment would make a heavy viscose material. Referred to as the vehicle - to transport the pigment from paint tin to wall. Note:- there are other oils used to give many different properties to paint.

Now this is where the thinners or turpentine comes in. The thinner added to this mixture creates a material that can be applied with a brush. The thinner or turpentine then evaporates leaving what we know as the paint film.

Ian - Painting Gyproc Coving

Ian's Question

i have recently put up gyproc coving in my house, and want to paint it. can i just emulsion it, or do i seal it first with PVA, or with watered down emulsion. either one or both or do you have any ideas. please help.   thank you.

ANSWER

Gyproc is a brand name but all it is a sandwich of plaster between two sheets of very heavy paper. Plasterboard is made in exactly the same way. It will need some prep and then apply a mist coat, that is a coat of thinned down emulsion, to allow the first coat to penetrate and satisfy the porosity of the surface. The normal paint system will then follow.

N.Watts - Mural Painting

N.Watts Question

I would like to paint a mural on an exterior garden wall, please can you tell me which sort of paint that is available in all primary colours, weatherproof and long lasting would be best to use?

ANSWER

The paint you use to create the mural can be normal PVA emulsion, I have used it for years. The surface you are painting on must have its correct primer, the correct middle coats and after you have painted the mural the correct protective coating.

If it's going to be painted on a brick wall, after removing all loose and powdery deposits, prime and apply a good quality, smooth stone paint oil or water based paint. Paint your mural and then apply a clear coating or varnish. Use the same specification for similar exterior surfaces but using the correct primer and always remove loose and flaking material and make good before you start painting.

Sharon - NVQ Questions

Sharon Beaumont's Questions

Sharon says she is stuck on some questions set by the NVQ, here they are.

Question 1.  State why old paint flakes. 

ANSWER

Paint flakes from a surface for many reasons here are a couple - Preparation, the correct preparation has not been carried out. If a surface is powdery or dusty and it is not cleaned off the dust will lie between the surface and the paint and when dry the dry film will lift from the surface, its the same with dirt or grease.  So - Because of incorrect preparation.

If the surface is absorbent such as wood and moisture is allowed to get in and under the paint film then it will lift off the paint. This is quite common where the joints in an exterior window frame open up due to the timber being unseasoned and the rain gets in. The rain water is absorbed but then wants to dry out and in doing so pushes the paint off the surface.  So -Because the substrate is damp.

Question 2.  State the main points to be considered when abrading metals.

ANSWER

Toughie. And a little bit ambiguous, sounds like a typical City and Guilds question. I am thinking, when abrading bare metal, not previously painted. Here we go. Its no good using glass paper, not hard wearing enough, you must use emery cloth or emery paper. This is used either dry - wear a dust mask - or with white spirit as a lubricant - wear gloves or barrier cream. Do not prep metal in a damp atmosphere, it will rust very quickly after it has been abraded. In all cases apply primer coat immediately after preparation. So - 1. Abrade dry.  2. Prime immediately after abrading. 3. Wear a dust mask.

Question 3.   State any 3 safety considerations before starting work.

ANSWER

1. Always carry out a Risk Assessment and continue to do so. 

2. Always ware the correct PPE. 

3. Always have and use the correct scaffold. 

4. Check all scaffold before use.

Question 4.   The procedure for treating mould to walls.

Mould grows on a damp surface, the cause of the damp, whether it be penetrating or condensation, must be fixed.

The surface must be washed with a fungicide solution to kill the mould and sterilize the area. Then remove all heavy deposits of mould growth by scrapping, if you are stripping wallpaper then add fungicide solution to the water. After preparation the wall is washed down with a fresh fungicide solution to remove all tracers of mould, paste or dirt. A last wash of fungicide solution is then left on the surface to dry and the wall is checked after a week.

Natasha - Lime Wash

Natasha's Question

Could you tell me how you would do a lime wash effect onto pine cupboard doors that I currently have. I have a unit in the kitchen that is lime washed effect and want to tie the cupboards in with the rest of the kitchen. Can you help?

ANSWER

My dad used to limewash our back yard walls when I was very young to keep them looking clean, tidy and very white. Limewash, then, was a mixture of slacked lime and water.

Limed oak was an effect created on real oak using the limewash, as mentioned, and when dry brushing off but leaving the white in the open pores of the wood. The lime, to some extent, bleaches the oak.

A similar effect can be gained by using a thick white emulsion paint or thinned down wood filler after first sealing the surface with a thin coat of varnish. The white paint, or whatever, is caught in the open pores of the oak enhancing the grain and giving an unusual effect. Pine does not have open pores so the effect will be different unless you cut the pores in yourself.

Mix up some very thin matt emulsion paint, colour of your choice and have some clean rags to hand. The pine must be unpainted, unvarnished or the effect will not happen. Sand down the bare timber with coarse glasspaper. The lighter grain, which is the summer growth of the tree, will be more absorbent so the emulsion colour will be seen in this part of the wood only. Experiment with different colour and mixes of water to emulsion on spare pieces of pine. You've got it right when the emulsion wipes clean, with the rag, from the darker grain and leaves the colour in the lighter part of the grain.

Gill - Terebine & Whiting

Gill's Question No.1

What is terebine dryers and gilders whiting?

ANSWER

Terebine is a liquid oil paint dryer used many years ago when painters and decorators mixed their own paint on the job. It is now added to a gilp mixture (one part raw linseed oil to two parts turpentine or white spirit) when creating marble, wood grain and many broken colour effects.

Whiting or chalk dust is used in many ways. For the gilder it is used in two main areas. First it is used to cover the surface of a sign prior to gilding to stop the gold leaf sticking to parts of the sign other than the letters. The whiting is placed onto a clean cotton rag and formed into a bag with the whiting inside, this is known as a pounce. The bag is dabbed or pounced onto the sign prior to applying the gold size and gilding. The particles of chalk are brushed off the surface with a soft brush leaving a fine powder. The fine powder will stop the gold leaf from adhering to the surface. French chalk can be used in place of the whiting.

The second is when whiting is used to prepare a glass prior to glass gilding. When glass gilding the glass must be spotlessly clean. The whiting is mixed with methylated spirit and with a rag rubbed over the surface to be gilded. In drying the methylated spirit cleans the grease from the surface and the whiting absorbs it. It is then removed with a clean cotton rag ready for gilding. Fuller's earth  is very often used in place of whiting as it has a high absorbency element.

Gill's Question No.2

When doing an effect using oil base, is it better to mix your own using the above or use a brand, also is there a big cost difference?

ANSWER

To mix up a gilp of your own, as described above, you have more control over the amount of dryer etc. you put into the mixture. Oil based scumbles or clear glazes can be purchased but they can be expensive. When mixing your own you can make just the amount you want leaving no waste. To make up an oil based scumble just add melted bees wax to your gilp.


Nobby - Acrylic Marbling

Nobbys Question

Could you tell me about acrylic marbling or water based marbling and how its done please?

ANSWER

Water based pigment does not flow over a surface in the same way that oil based pigments do. For this reason alone it is difficult to soften one pigment colour into another. This being the primary technique of marbling, to create a sense of depth, you can see the problem.

Having stated the above there are many specialist decorators out there creating excellent marble effects using acrylics.

Acrylic pigment, straight out of the tube, will dry a lot quicker than oil colour so we need to slow its drying time down. We do this by adding glycerine. This is the same glycerine used to sooth a sore throat or to make Victoria icing on a cake.Glycerine is the by-product from the splitting of natural oils or fats during Fatty Acid production but basically water with impurities, the impurities stop the water evaporating therefore slowing the drying time.

You can also purchase ready made acrylic scumble which is acrylic varnish with the addition of propylene glycol. Propylene glycol is used in antifreeze, food, plastic and the perfume industries. For all intents and purposes it is a synthetic glycerine.

Experiment by mixing either of the above with acrylic tube colours and blending one colour with another. The colour mix should stay wet until you have achieved your desired effect and at the same time start to dry soon after. You will find the technique a lot quicker than with oil based colours. 

When you find, after practice, you can control the blending and softening of colours in water have a look at the sienna marble technique on this site. Although it's referring to oil colours the details are the same.

The beauty of using acrylic colours for marbling is that they do not yellow as do oil colours and there are no solvents used in the process.

Robert - Colour Washing

Robert's Question

Hello Fred, one of your former students here, have you got any good tips for Colour Washing? I have been asked by a friend about it but could not help. The only place I could think of was your web page, hope you don't mind. All the best Robbie.

ANSWER

Colour Washing is one of the more simpler decorative techniques but it is so often misinterpreted. The finish is normally applied to walls over a matt emulsion base, colour of your own chose. Choose another emulsion colour and mix with about the same amount of water. Take a large wall or flat brush, dampened, and dip into the thinned emulsion, to about half an inch up the bristles only, shake and apply in criss-cross strokes. The trick, if you can call it that, is not to have too much thinned emulsion on the brush as the colour will run and you must start from the top of the wall and work your way down.

Plector - Just Funny

Plector's Question

I am a very slow worker and by the time I dip my brush into the
paint it has formed a thick skin. When I paint with this it leaves a very
lumpy surface(sometimes I have to spread it with a knife). The skin tends to
stick to the rag and the rag sticks to the wall. My bedroom wall is covered
in rags and looks quite good (as they are all different colours) A neighbour
told me I have got the technique wrong but my wife disagrees. Who is right?
The bathroom wall is covered in sponges and I think this ties in well with
the deep sea theme,I can also rub myself against them for a quick wash (and
dry myself on the bedroom wall). My son was quite upset when I borrowed all
his marbles but is delighted with his newly marbled bedroom walls,
unfortunately my wife finds them difficult to dust. She said she thought I
was loosing my marbles but I don't remember having any. We are looking for
an unusual effect for the dining room and have considered using wigs (for a
fresh combed look)but feel it might be too expensive. Do you have any
suggestions.
Many thanks in anticipation of an answer
Plector

ANSWER

To the first part of your question - your wife is right as always.

For the second part - I don't think you're loosing your marbles rather finding a new trend.

To the last part - use synthetic wigs.

Keith - Marbling

Keith's Question No 1

When Marbling, what is the best paint to use to create the effect, and where can i buy it?

ANSWER

Artist's oil paint in tubes, obtained from any art shop. The artist's oil colour is then mixed with a gilp (one part raw linseed oil to two parts white spirit and a small amount of driers) before being used to create a marble effect.

Keith's Question No 2

What is a veining horn?

ANSWER

A small piece of wood, leather or plastic rounded at one end and used to create veins in marble. It can also be called a graining horn when used to create dapples in graining.

Tuesday 2 June 2009

Russ - Puttying

Russ's Question No 1

1. When puttying windows, do you have to angle the putty up to the glass, or can it be laid flat like filling-in cracks with filler on skirting-boards etc ?

ANSWER

The putties need to be angled to allow the rain water to run off.

Russ's Question No 2

2. On new windows sometimes they arrive at the clients as so called pre-primed, though they still show as natural wood. Can I assume that priming has been done correctly and go straight into undercoat, or do i still prime them myself ?

ANSWER

Do not assume anything.

Russ's Question No 3

3. When wallpapering and having to angle round obstacles like protruding window-sills etc how do you know at what angle to cut the paper at ? Is there a set way of cutting.

ANSWER

Push the paper right up to the side of the sill and you will see how far to cut the paper.

Russ’s question No4.

I am doing a job at present where a window-sill needed some wood-filler. All the wood is being wood-stained with 'light walnut'. The problem I have is that the filler is showing through the wood stain, how do i overcome this?

Answer.

Use ‘Brummer’ Exterior Wood Filler, it will take a stain the same as wood and choose a colour to match the wood you are decorating.

Russ’s question No5.

Preparation to wood that has been stained. I have come across a situation where external wood-paneling has been poorly prepared in the past and just had additional woodstain applied. The result is an uneven surface with a variety of shades. To what extent do i prepare this, do I need to strip back to bare wood?

Window-sills have also been a problem where patches have flaked off, even though I abrade the surface and feather it, as tutored. The result is that that area though smooth, it becomes a different shade to everything else due to applying the woodstain to different shades of wood through the preparation process. The only thing I can assume is that you need to strip the surface bare to obtain an even colour !!! So please can you explain what preparation I need to apply ?

Answer.

Wood stain stains wood through being absorbed by the wood, therefore, for the stain to work evenly all surfaces should be unpainted or stripped.